


This is what we're making.
Needed:
My Tag tube (Feeling Lucky) Download supplies folder.
A script font of choice (I used Liorah BT) this is a PTU font.
A pixel font of choice (I used PF Mil to add my watermark)
You also need Happy St. Patrick's Day WordArt by Me (download from my supplies folder)
Animation Shop
*Just a little note before we begin, the tag tube was created by me and belongs only to ME, that means that I do not give permission to use it in any other tutorial besides the one I have just written.
Let's begin:
1. Open a New Image in PSP with dimensions 550x500, make background color white. Now add a New Layer.
2. Select your Oil Brush Tool with settings:
Shape: Square - Size: 28 - Foreground & Background color: #fa62b8
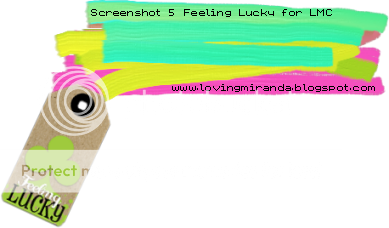
3. Now, draw a brush stroke from left to right, make it as long as you'll be able to fit your name.
Draw 2 more brush strokes, one in top of each other; cover empty spaces. This is what I came out with:

4. Change your Foreground & Background color to #9fca3d and draw three more brush strokes on the bottom of your last stroke. You should get something like this:

*Now you see how the colors change when they are mix together? It's like mixing paint with different colors to get different results.
5. Convert your layer to Raster Layer (the one with the brush strokes). And again, start drawing some more strokes using different colors until you get the results you want. Have fun & be creative!
Just a hint: Whenever you change your color, your strokes will be getting dark every time you use your Oil Brush; what I do to get the color I chose, I just brush until I see the color that I picked start showing off, and then delete this layer: Art Media Layer.
6. If you want to use the colors I chose for my tagback, here's the list:
Green: #9fca3d, Yellow: #f4fe4a, Blue: #4afee7 (follow this in order)
And this is what mine looks like:

7. Hide your Background layer & merge all of your layers together. And rename this layer as TagBack. Option, you may flip your image; I flip mine because I rather have the green color on top.
8. Duplicate your Tag Back layer, and change your blend mode to Soft Light or your choice of blend, the one you think looks best. This is done just to make the Tag Back look a little bit more lighter. This is how it looks now:

9. Now open my Feeling Lucky tag tube, copy and paste as New Layer in your working canvas. Rename this layer as tube. Resize your tube - Go to Image - Resize 80% - Smart Size - Resize all layers deselect. Time to rotate - Image - Rotate - Free Rotate - Direction Right at 25 degrees. Hit OK.
10. With your Move Tool, arrange my Feeling Lucky tag tube to the left bottom corner side of the Tag Back; make it look like the tag is on top of the Tag Back touching only the very corner. This how mine looks:
11. Duplicate your tube & rotate this time to 50 degrees to the left. Hit OK. Arrange this copy on top of the original tube, again make sure that the tag is touching just a little bit the bottom part of our Tag Back. Duplicate this copy of your Tube, and rotate this time to 25 to the left & arrange just like the previous one. You should have a total of three tube layers, you may sharpen every tube if you like, so it won't look blurry.
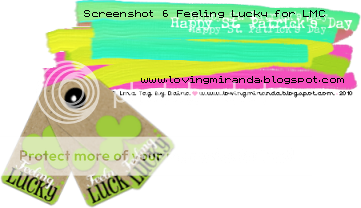
12. Add your watermark in a New Layer, move your Watermark layer below your tube layers & arrange wherever you like. Open the Happy St. Patrick's Day WordArt; copy & paste as new layer in your canvas. Rename as Wordart and arrange to the top right corner of the Tag Back.
This is what you should have now:
13. Time to add your name. Select your Text tool with settings:
Font: Liorah BT, Size:72, Anti-alas: Sharp, Background Color: White & Foreground: Null, and one more thing.
In your Background palette, there are three options in the bottom which are Color, Texture , & Transparent. Tick in the Texture option, to make your text textured. This is how it looks when selected (my arrow shows you which one is the Texture option):

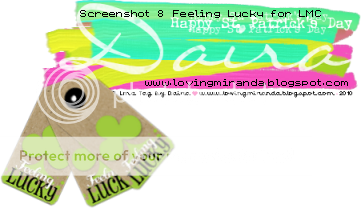
Now that you have your settings set, add a New Layer & type your name. For your first letter of your name, make the text size to 90 and the rest to 72. Hit Ok. If your tag back is smaller than mine, then make your text smaller to fit in. Arrange your name in the middle of the Tag Back or wherever you like best & Deselect. Duplicate your text layer and merge down the two text layers together. Rename as Text.
This is how your tag should look like now:
14. Crop any unwanted area. And hide your two copies of your tube.
Time to animate!!!
1. Go to Edit - Copy Merged. And launch your Animation Shop. Paste your copy as New Animation in AS.
2. Go back to your PSP, hide your original Tube layer and unhide your first copy of your tube; Edit - copy merged and paste in your AS After Current Frame. Again, back in PSP hide the copy of your tube layer and unhide the copy of the copy of your tube layer. Copy merged and Paste After Current Frame in AS.
3. Now you should have a total of three frames. Go to Edit - Select All and then Animation - Frame Properties and set the Display time to 40. Play your animation and check your results.
4. Save your tag as .gif
And you have a new tag!!!
Thank you for trying my tutorial, hope you have fun doing it. You can do different tags using this method, just like the one I did, this one:

The concept of this tutorial is copyrighted to me, so whatever you create using my tutorial are yours, as long as the results are not use for any kind of profit.
Feel free to print out this tutorial for your own personal use, or you may share my link with others, but do not attempt to claim as your own.


No comments:
Post a Comment